MIDI with Dot X
Dot X supports MIDI output by simulating a MIDI device from within the software. This means that any compatible device you connect to Dot X (Decker / deej with Dot X specific firmware) can send their commands and values using MIDI to any software that supports a MIDI input. In this example we will configure Dot X with MIDI and connect it to VoiceMeeter.
Configure Dot X MIDI output
1. Install a virtual MIDI port
Dot X MIDI output works by attaching to a virtual MIDI port on your computer, a so-called "loopback" port. Dot X does not have this built-in, but there are plenty options available. We have tested LoopMIDI by Tobias Erichsen, which is what we will be using in this guide.
Note
LoopMIDI is a windows specific program so if you're on other operating systems you should find a program that creates virtual MIDI ports for your operating system.
2. Create a loopback MIDI port using LoopMIDI
2.1 Type a name in the bottom input box, for example deckerloop. The name is not important, so you can choose whatever name you like!
2.2 Press the "+" sign on the far left.
2.3 Confirm you see the new MIDI port in the list, just like the picture below. 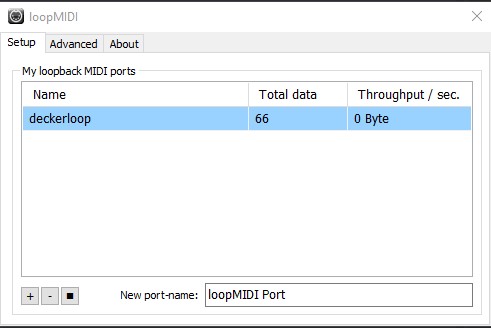
3. Assign Dot X to the new MIDI port
3.1 Open Dot X
3.2 Click the cog in the top right to open settings
3.3 Click the "Midi" tab
3.4 Check Enable MIDI Output
3.5 Select the correct port from the dropdown list
Your Midi settings should look something like the picture below 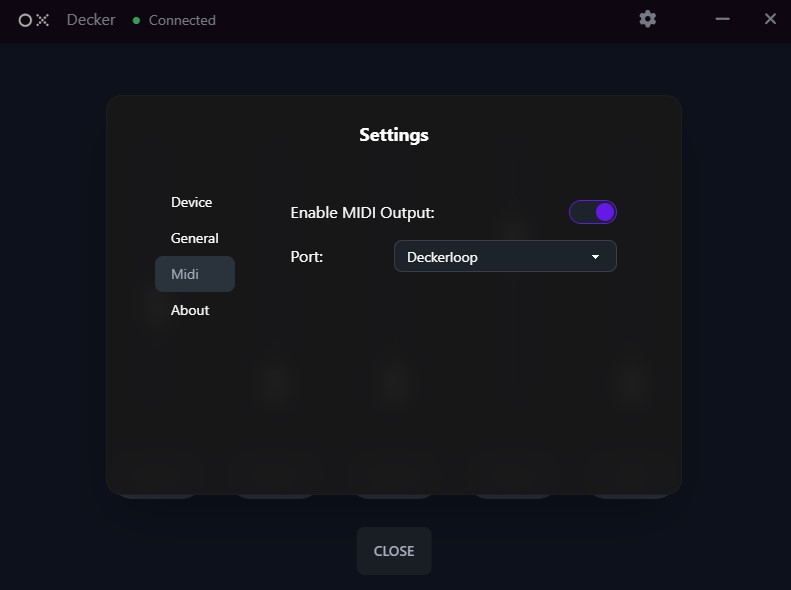
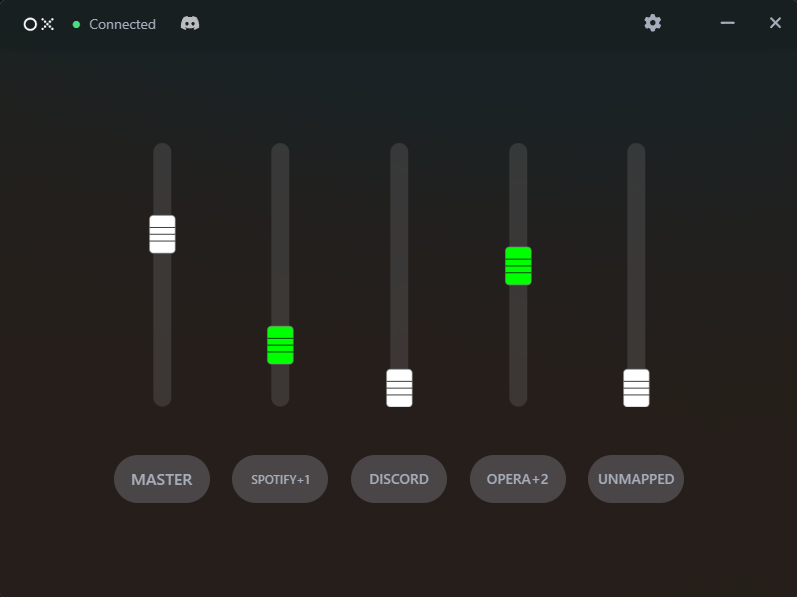
4. Enable MIDI for the relevant sliders
4.1 Go to the Dot X overview  4.2 Select the slider you want to enable MIDI for by clicking the button below the slider
4.3 Navigate to the "Midi" tab (Note: this tab will only be visible if you completed step 3)
4.4 Click the "MIDI DISABLED" button to toggle the MIDI function for the selected slider
OPTIONAL: Advanced users may choose to change the channel and CC Value should they wish to, but these can be left as they are 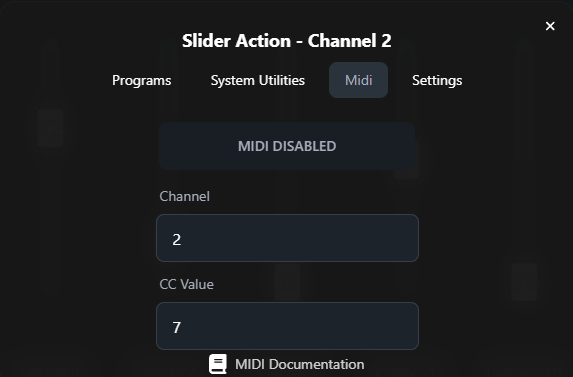 4.5 Repeat this process for all sliders you wish to enable MIDI for
All MIDI enabled sliders will turn green